Continuous Integration: C# to AWS Lambda
Update (5/28/2017): after I published this post, Norm Johanson tweeted back and recommended using the newly announced dotnet CLI integration for Lambda for deployment. I updated my sample project accordingly and can confirm that this indeed works great with CodeBuild - neat!
End of last year, AWS Lambda, Amazon’s popular Function as a Service (FaaS) offering, announced C# support based on the .NET Core runtime.
Which is neat, because there’s a lot of interesting things you can do with Lambda. One of them is hosting custom skills for Amazon Alexa, Amazon’s voice interface for Echo, for free. I’ll blog about that use case in a later post. (Spoiler alert: “Alexa, any answers to my Stack Overflow questions?”)
One of the first things I like to set up in a new tech ecosystem is a continuous integration (CI) pipeline. This post describes a simple CI setup for C#/.NET Core code to Amazon Lambda.
Writing an AWS Lambda function in C#
We’ll start by creating a clean new .NET Core project. Lambda currently supports the 1.0 runtime:
$ dotnet new classlib --framework netcoreapp1.0
Let’s rename the generated .csproj file to MyProject.csproj and the Class1.cs file to MyClass.cs.
We’ll also add references to Amazon.Lambda.Core and
Amazon.Lambda.Serialization.Json to the .csproj:
<Project Sdk="Microsoft.NET.Sdk">

  <PropertyGroup>
    <TargetFramework>netcoreapp1.0</TargetFramework>
  </PropertyGroup>

  <ItemGroup>
    <PackageReference Include="Amazon.Lambda.Core" Version="1.0.0" />
    <PackageReference Include="Amazon.Lambda.Serialization.Json"
    		Version="1.1.0" />
  </ItemGroup>

</Project>
Now, let’s edit MyClass.cs and write a minimalistic function:
using System;
using Amazon.Lambda.Core;

[assembly: LambdaSerializerAttribute(
	typeof(Amazon.Lambda.Serialization.Json.JsonSerializer))]

namespace MyNamespace
{
    public class MyClass
    {
    	public object MyFunction()
    	{
    		return new
    		{
    			message = "Hello from Lambda!",
    			time = DateTime.UtcNow
    		};
    	}
    }
}
With the LambdaSerializerAttribute, JSON serialization will be taken care of. Basically, our function can just accept and return .NET objects as needed.
Manual Deployment
Before automating build & deployment, let’s set up our lambda function manually. On the AWS Lambda dashboard page, click Create a Lambda Function and select the Blank Function blueprint. Skip the Configure triggers page for now.
On the Configure Function page, give your function a name and select the C# runtime (which should really be called .NET Core 1.0):
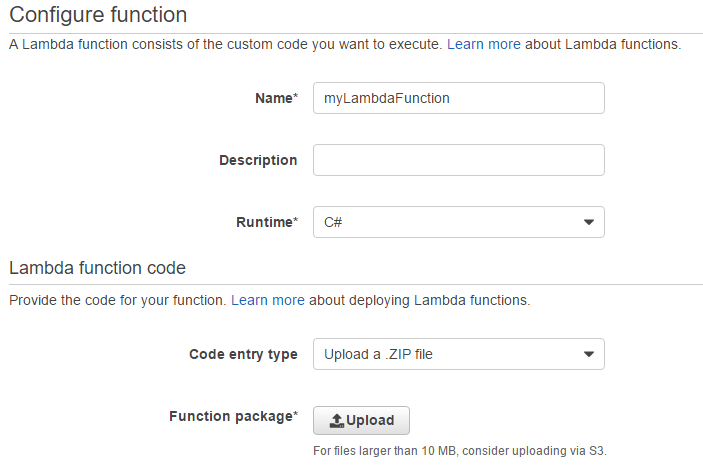
You’ll notice that unlike with other runtimes, unfortunately we can’t just paste our code inline right here. Instead, a zip file with our compiled assembly and all references needs to be uploaded. So - time to build and package our function:
$ dotnet restore
$ dotnet publish -c Release
Now we need to zip the content of the publish folder…
$ cd bin/Release/netcoreapp1.0/publish
$ zip MyProject.zip *
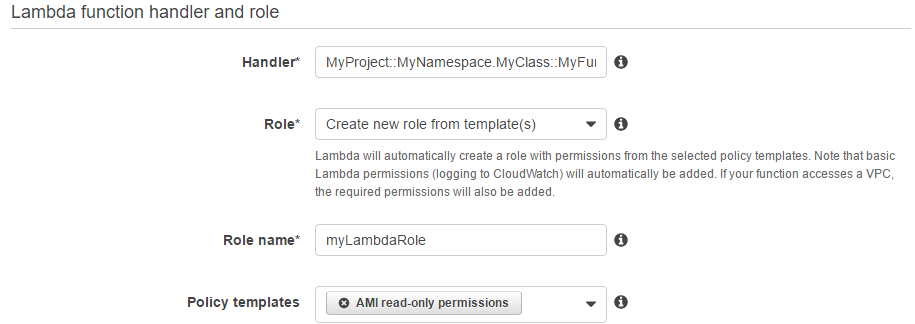
… which creates the zip file we’ll have to upload. We’ll also have to specify a handler, which is the function’s entry point in the format assembly::namespace.class-name::method-name. In our case, that’s MyProject::MyNamespace.MyClass::MyFunction. Finally, we have to specify a role for security purposes:
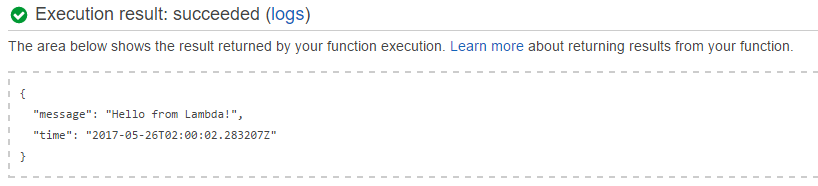
And that’s it! Create the function and test it, it should return a result like this:
Adding an API Gateway trigger would expose the function to external callers, but let’s not worry about that right now.
Automatic Deployment
Of course, we don’t want to manually upload a zip file through the Lambda UI every time we want to deploy a new version of our function. Fortunately, it can be done with the AWS Command Line Interface (CLI) via update-function-code. So, in order to build and deploy from your local machine, add the build and zip steps above to a shell script (if you’re on Windows, you’ll need to install a command line zip tool), followed by:
aws lambda update-function-code
	--function-name myLambdaFunction
	--zip-file fileb://MyProject.zip
Note that the CLI also supports create-function, in case you also want to automate the initial setup.
AWS CodeBuild
Building and deploying from your local dev box is not ideal though. What we really want is clean, reproducable builds on a build server and a fully automated deployment pipeline.
There’s an endless number of CI tools to choose from, but for this exercise, let’s stay inside the AWS universe and go with AWS CodeBuild. CodeBuild is a fairly recent addition to Amazon’s services. It’s not particularly sophisticated in terms of features, and pales in comparison to full-fledged solutions like TeamCity (which we’re using at Stack Overflow). But it’s doing one thing well: just like other cloud services, it provisions and scales resources on-demand as needed, and you’ll get billed by the build-minute. With a non-expiring 100 build minutes per month free tier, we’ll be able to deploy a good number of updates to our Lambda function free of charge.
First, let’s check our code in to a GitHub repo. Here’s mine: dotnetcore-lambda-sample
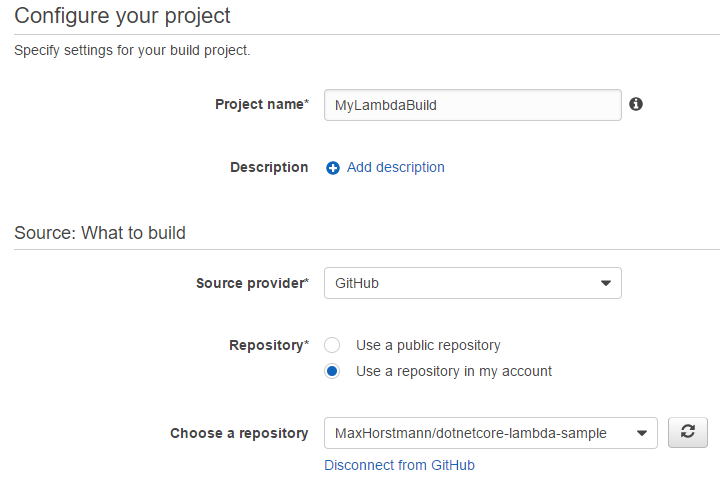
Next, let’s go to the AWS CodeBuild console and create a new project.
We’ll give it a name and link it to the GitHub repo…
…and now for the interesting part: we need to specify a build environment and the actual build steps. For the build environment, CodeBuild supports (Linux) Docker images - great! So, what we’ll need is an image which contains the .NET Core SDK and the AWS CLI. Conveniently, Microsoft provides a set of official images for .NET Core on Docker Hub called microsoft/dotnet, with respective tags for the various runtime and SDK versions.
With only a few steps, we can create our own Docker image based off microsoft/dotnet and publish it to Docker hub. Here’s the Dockerfile:
FROM microsoft/dotnet:1.1-sdk
MAINTAINER Max Horstmann

RUN apt-get -y update
RUN apt-get -y install zip
RUN curl "https://s3.amazonaws.com/aws-cli/awscli-bundle.zip"
				-o "awscli-bundle.zip"
RUN unzip awscli-bundle.zip
RUN ./awscli-bundle/install -b ~/bin/aws
The Microsoft dotnet image doesn’t contain the zip utility, so we had to throw that in as well.
In order to get the new Docker image published to Docker Hub, I set up an automated build for a new image called maxhorstmann/dotnetcore-lambda-ci. You’re welcome to use it, too.
So, back to our CodeBuild setup - let’s point it to our new Docker image:
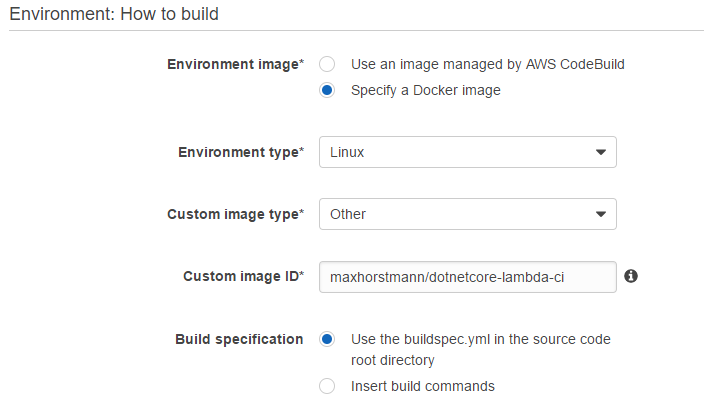
For the actual build steps, we’ll drop a buildspec.yml file into our repo which looks like this:
version: 0.2

phases:
  build:
    commands:
      - dotnet restore
      - dotnet publish -c Release
      - cd bin/Release/netcoreapp1.0/publish
      - zip ../../../../MyProject.zip *
      - cd ../../../..
      - /root/bin/aws lambda update-function-code
      			--function-name myTestLambda
      			--zip-file fileb://MyProject.zip
And we’re almost done. There’s one more thing left to do: the AWS CLI needs proper credentials to talk to Lambda, so we need to set two environment variables, AWS_ACCESS_KEY_ID and AWS_SECRET_ACCESS_KEY:
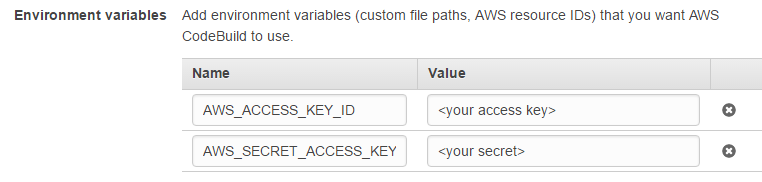
See Managing Access Keys for IAM Users.
Build!
Let’s try it out and check in a small code change to MyClass.cs…
    	public object MyFunction()
    	{
    		return new
    			{
    				message = "Hello from Lambda!",
    				automated_build = true,
    				time = DateTime.UtcNow
    			};
    	}
.. and kick off a build:
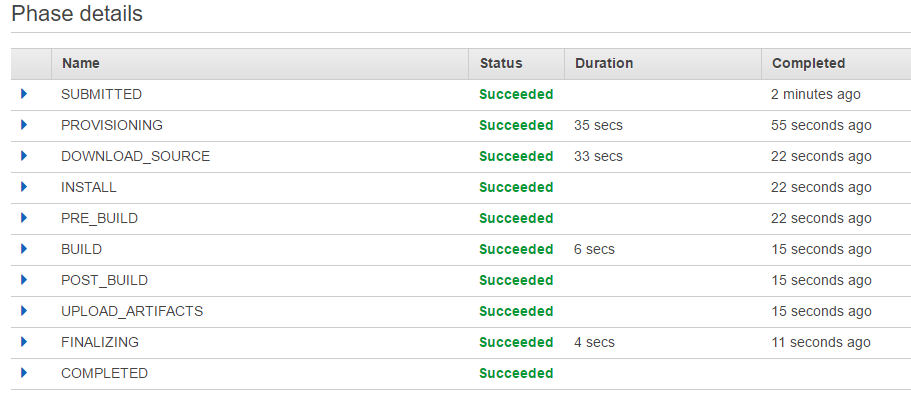
Success! A little over a minute for a complete build & deployment isn’t too bad if we keep in mind that this includes spinning up the build environment with our Docker image. Consecutive builds shortly after tend to be even faster if we happen to hit a build machine with a cached version of the Docker image - I’ve seen build times as fast as 22 seconds.
Let’s quickly confirm that our Lambda function has really been updated:
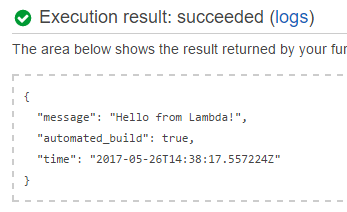
Yup!
Web Hooks
Clicking a single button to build and deploy is already pretty good, but wouldn’t it be even nicer if any git push to the master branch triggered a build? (At least to a staging environment, not necessarily your production instance)
Unfortunately, there’s no trivial way to set this up just yet: on the GitHub side, there’s out-of-the-box integration with several AWS services, but CodeBuild isn’t one of them yet. Their support team promised me to look into it:
@Max_Horstmann Thanks for your interest! I'll let the team know you're interested in AWS CodeBuild being added! -SJ
— GitHub Support (@GitHubHelp) May 22, 2017
Same on the CodeBuild side: although the build configuration is aware of the GitHub repo it’s pulling from, unfortunately you can’t set it up to automatically kick off automated builds on pushes to that repo.
I contacted AWS support and they suggested to try hooking things up with Simple Notification Service (SNS) and/or Simple Queue Service (SQS). Unfortunately though, both these services do integrate out of the box with GitHub, but not with CodeBuild - i.e. a git push can trigger a notification message, but there’s no easy way for that message to trigger a build. A nice extension to CodeBild would be the ability to subscribe to a SNS topic and trigger builds accordingly - hopefully something they will consider adding in the future.
That’s all for today. Happy CI-ing!